

This is a blog, a blog about media.
Monday, 23 December 2013
Friday, 20 December 2013
Rough Cut & Feedback #21
Rough Cut
Feedback


From this feedback we definitely know that there will be a rough cut No.2 when the music video is all together and edited. The main thing for us isn't so much specific camera angles and editing etc. because we have researched so vastly into that, but it is more how they work all together and what they mean when they do so. The narrative itself and what it shows is extremely important for us and holds the key to the integrity of the overall music video; and this is why it is so important to get right. There are so many different locations and two different things going on at the same time (band and narrative) that we have to try and make the work collaboratively brilliant in order to represent a whole theme and story within many other sub-themes also. The problem with ours is that although our ambitions for the narrative follow the emotion shown in the 'Float on' lyrics, the lyrics and actions don't semantically cooperate. This is when the camera angles, editing, lighting and the mise-en-scène come in to produce that feeling and emotion and when clarity of the story is (fingers-crossed) achieved.
The video is only 23 seconds long as we don't have all the footage, and that is the clear disadvantage for us. All of the feedback we got was good feedback apart from some improvements that could be made to the fine-tuning of the editing. We have already set out to tweak this before we start filming and editing all of the other scenes just so that we don't have to go back to it after (only if it fails to collaborate with the other scenes sufficiently).
Thursday, 19 December 2013
So many Green Screen attempts #20

If this was the only way I could have done this part of the music video then I would have made it work, but seeing as after the holiday break we will be able to re-film it I thought it was best to just wait after all these attempts to try and make it perfect.
There were many problems to the way I did it and many reasons to why it failed but over ruling factor was that I was filming in my house and not s studio. This on its own caused problems such as height difficulties, lighting difficulties, framing difficulties and more.
Most of the problems evolved from the fact that there was little space and this meant that when I was supposedly walking everything would look wrong in the editing stage. I tried just standing on the spot and walking and then when it came to editing just using the ken burns tool would make me move. However that idea went straight into to bin as when I looked at what I had recorded my feet didn't look at all like there were walking forwards and it just all looked wrong. Then after this hinderance I thought it would be best to try and re-evaluate the situation and see if I actually did have to walk. I ended up just recording myself standing and looking around etc. so then when it came to editing what I thought of doing was placing myself on top of a cloud and the cloud would move around with me on it through the dream world. This seemed like a brilliant idea at first but it just involved way too much technical editing such as motion tracking of two objects, and then that meant using multiple pieces of software, and for something that looked only half-decent it wasn't worth it.
After all of this trauma I decided that I'd just wait until I could use the space of a studio to film the green screen part of the video. Let's just see how it goes.
Diary Entry - Filming & Editing No.4 (BAND PROBLEMS) #19
Depending on others is a recurring problem for us and because the band performance meant we had to depend on four or more people, this was a serious problem. There were many attempts to try and record the band performance before we actually decided on what to do and this diary post will explain everything that has happened and everything that is going to happen.
The studio space we thought would be the best solution for the place to record the performance, as it would have a similar feel to many other music videos that we have researched and seen previously, however this posed as a problem also. Alike to the green screen problems in the run up to christmas resources became limited as there were tens of people wanting the same space and equipment etc. We had the drummer and we had the singer/guitarist but the main problem was trying to pick a date that everyone was able to do, and with work and college this was immensely hard. This meant that for most of the scenes/shots we weren't able to film until after christmas and this fact just threw the initial shooting schedule right out the window.
Following the attitude of the song, and not to seem intentionally ironic, but we persevered and due to our optimism of the project we saw this as an opportunity to become better directors/ filmmakers/ editors/cameramen etc. I knew we wouldn't have the equipment, and I knew we wouldn't have the resources either, but alike to the green screen filming also I found ways to still try and make the band performance look good.
Instead of a studio I decided that it would be best to try and find a house that had the same look as what the audience would be able to relate too. Luckily y friend (the guitarist and singer) has precisely that look in his bedroom (following the nature of his musical creativity). There are many posters, instruments, amps etc. located everywhere so this is going to clearly be the best place for it, and all that is left is to put my research into lighting and mise-en-scène to apply it to his bedroom. This would then give that professional feel of the studio, but also the indie feel also.
The equipment was the main thing that we were going to miss, and in order to make up for it I had to come up with some cheap ways to make use of the best we had. The 'Equipment' post shows all of the equipment we will be using for all of the recordings but here I will explain why I got everything I did. I already had the DSLR and the waterproof camera but I wanted one more camera and another fish eye lens or wide angle. For this I decided to use my phone to record, although it's 1080p the quality still isn't great and no where near as good as the others. The fish eye lens look was already able to be achieved on the DSLR with a lens adapter, but I wanted to use the DSLR for close-ups so that means the fish eye would have to be on the other two. So I bought a fish eye and wide angle magnetic lens adapter from Amazon for £6.99 and this meant that I could attach lenses to all three cameras at the same time as the package included two lenses. This is going to make the band performance a lot easier, and I didn't stop there with the DIY/Cheap aspects. I also bought a dolly from Amazon (again) for £1 it was very cheap, but it is coming from China and hopefully it'll be here soon.A few months ago, ready for this project and other filming ideas I decided to create a monopod out of baseball bat that I owned. I have always wanted a monopod as well as a tripod as they are much easier to carry and they are a lot easier to use for some shots. The baseball bat has a grip on it also so trying to get to those high-up, hard-to-reach places is going to be a lot easier when it comes to recording. Apart from the more proper equipment, things like tape and the Gorillapod will be used to put the cameras in weird and obscure places once more to try and get a better look for the indie genre we want to try and show.
The plan is then to work through Christmas on planning, visualising etc. before we record at a friend's house. This will give us time to research even more and make the probability of the recordings going perfect much much higher. Let's just hope it goes that way.
Thursday, 12 December 2013
Diary Entry - Filming & Editing No.3 (NIGHTMARE) #18
Producing this video over the past few weeks has been an absolute nightmare for q few main reasons - lack of resources, high dependency on others and just plain unlucky situations and events. We knew at the start how much of a momentous task this was going to be but we didn't anticipate many of the things that would happen with filming and editing that was going to cause problems or hindrance to the project's deadline.
First of all the biggest of problems that is still ongoing is the major issues with recording the green screen footage. With the run up to Christmas on its way everything else in life becomes a bit hectic and not only are our deadlines for the project closing in, but they are for many other students as well. Access to the green screen room to produce some film-work for the 'dream world' scenes became immensely hard to come by as all the rooms had been booked up to the half term. Not only was this the case, but trying to find others that were able to help became very hard also as they had priorities with activities outside of work such as jobs etc.
In order to make up for the time we decided that the best plan would be to try and film and edit quite a lot of the recordings over the Christmas break, but then this would inevitably lead us to one burden of a factor for the project, that it would have to be filmed inside a house of ours. For the green screen shots I knew that all you needed was in fact a big piece of cloth that was the colour green as keying works by eliminating a colour from a frame and green is the furthest away from your skin etc. Amazon proved to me that green screens weren't that cheap and in fact for a project such as this, paying out that much money for a good green screen wouldn't be as much beneficial as it would be ridiculous. Following the previous fact that the material just had to be green, I searched for 'green cloth' and an item came up for £1.04. The material clearly wasn't going to be that big but I knew that we could just tape multiple pieces together, so considering the price I ordered four pieces as well as some green tape. The items are on their way now, but the only problem now I that I still worry about the look of the shots and whether or not they will still look professional. On the other hand though the genre is indie and D.I.Y home made things are more a part of that genre rather than multi-million pound professional studios.
The final problem that we knew we would have to face over the Christmas break is that we wouldn't be able to have all of the equipment that the College provided and this meant that we had to stick with what we had. Luckily for myself I already own quite a bit of small pieces of equipment such as a tripod, a small dolly and a waterproof camera as well as a DSLR so it isn't going to be that difficult to record everything. The problem we still faced was that the shots we want to record with the GoPro won't be able to be done, which is extremely annoying as the shots taken in the tests seem to be very original yet creative and good looking. The GoPro was also the camera going to be used for the underwater shot and although I possess an underwater camera I am going to have to think of a way whereby the wide-angle look will still be able to be created as my camera doesn't offer the same as the GoPro. Finally the one other thing we won't have is one more DSLR to film with, so when it comes to the band performance it will take a lot longer than expected as we will have to take more shots on one of the cameras.
Friday, 6 December 2013
Diary Entry - Filming & Editing No.2 #17 Bristol

Today, Shani and I went to Bristol for the recording of one of the first scenes, and some exterior shots for the cross-cut virtual and reality scenes. The weather was perfect, there weren't many people so there was only one thing left to do, record.
Filming
The first plan was to set off for Park Street and the College Green; we knew there was a lot of architecturally beautiful buildings, and the colour of the buildings along with the weather would really go well with mood that the video is trying to present at this point (optimism). We chose the City Hall to record next to, as it would show the typical 'worklife' very well.
 This scene would only go on for ten seconds or so, so although we knew there was little video that needed to be recorded, we still captured ten times as much as we needed too. The reason for this was because at the start I wanted the video to show the beginning of an adventure for the main character and I believe a montage of shots represents this height of emotion and dream to set off into the unknown, as well as engaging the audience thoroughly. Taking all of this into consideration many shots were taken at different angles, different movements and different distances in order to throw the excitement in as much as possible.
 As far as recording went, there wasn't much fuss or nuisances at all. There were a few times where we had to wait for people to walk by etc. but this was general minor hindrances that were to always be expected when filming in uncontrolled exterior situations.


The close up shots for this scene worked out really well because we managed to create the perfect amount of blur in the background of the shot using the DSLR and there was enough light for all of the shots together to look of very high quality. The light also helped us with the colouring of the clips afterwards. The amount of light that we were given with the exterior shots meant that we could customise each shot's look to a very detailed standard and it made the whole job a lot more accessible and a lot easier.
The shots towards the end turned out beautifully as they displayed a very lovely looking, architecturally magnificent archway that was framed perfectly symmetrical for the shot. Although this wasn't sought out before hand, I learnt that it is always key to acknowledge and understand the surroundings of the filming location as they may be a bit of a filmic hidden gem in the midst of the mise-en-scène. The light had worked out really well too (shown in the picture on the left) as when I exited the archway pass-through the light shined on me to a luminosity that almost looked unreal, and visually familiarised itself with that of movie moments of characters ascending to heaven. Although this may be quite far fetched, the shot and the way it was filmed still shows the same kind of message as it does in the movies; Going to a better place.
The filming itself was left to my partner, but to be both involved with it, discussions were made previously on the bus ride. I had brought a long with me the DSLR but instead of a tripod, a camera stabiliser or steadicam. This I thought would look a lot more realistic than a shot from a tripod, as you still get the stability, but with a little bit of movement and dynamic motion. Previous to this project I had studied many critically acclaimed indie movies and TV shows to see what makes a shot look so professional. Apart from the beautiful scenes and the glamorous actors, the main two things were blurred backgrounds and a minute amount of motion within the shot. This was especially apparent within the scenes of the TV show Breaking Bad. The steadicam proved useful for these 'staying-still' shots, and of course it worked a treat for the shots where Shani had to walk a long side or infront of me.
After Park Street there was only two more places left to go - the Waterfront and Cabot Circus.


Editing
For this part of the task fortunately enough the editing wasn't that difficult or time consuming. However,it had only got to this point of simplicity because I had researched, practiced and learned the best ways to edit this kind of footage before hand, which inevitably made the whole process a lot easier in the end.

First of all I gathered all of my clips together and extracted the best parts of them using the tool 'Favourite'. We already knew which shots would kind of go in order together so it wasn't that difficult in the end.
 The most important tool used in this process of editing and will be used for all the other processes would be the sound clip and the present waves that were shown on it. This made life a whole lot easier as it meant that I was able to detect where I should edit each cut too, and this way it was a lot more precise and quicker. This was going to prove to be extremely helpful in the latter stages of editing also because there will be so many shots of the band etc. to collaborate and to coordinate with the music that something as little as this could deduct the time consumption by half and allow myself to spend more time fine tuning each clip to look more professional.
One neat editing trick that I found really beneficial was having a long-length and low-dynamic shot being cut up into parts and being edited to the time of the music. Although theoretically most of these shots were part of the same overall clip the effect still looked pretty good on the screen, because the fact that it's the character that changes not the surroundings. Not only does this show a sped-up effect that conforms to the time scale in which we have to meet but it also presents the recurring theme once more of the character moving forward in a world that's going no where.
 Last of all to edit was the colouring of the clips. Because most of the clips were all filmed at the same light and with similar surroundings, each clip wasn't going to be that different visually and this meant that I could edit one clip and then copy the preset to all the others. To edit the colour I went onto 'correction 1' on one of the first clips in the inspector tool and manually changed the colours. I have many presets that I like, but the one I like the most is 'Spring Sun'. I used this preset for this choice and then lessened the green a little bit as shown in the picture to the side. Finally to make it look that much more indie, I decided that I would change the brightness and contrast a little bit to make the midtones more prominent and the highlights less so.

The hardest part of the editing here was with the character jumping or de-scaling into the pathway at the end of the scene. To do this we originally wanted o use green screen as we thought this would be a lot easier, but we tried a lot of attempts and it just didn't work out as we wanted it. So in order to make it look good I took a screen grab of the archway entrance with me in it and without me in it. I then edited these in fireworks so that there was a transparent background behind me. I then imported these into FCP X and the archway was below and the character was on top (in terms of timeline placement). Then to make the character descend into the pathway I used the ken burns tool (as shown above) to make my character disappear and appear to grow smaller as doing so. The final thing was to just make the archway picture and the character picture flow with the one before as because they had been screen grabbed and edited multiple times they lost some of the colour and brightness to them. For this I tried 'Match Colour' but this didn't turn out perfect, so instead I decided to manually change the colour and this was done by using the 'colour correction tool'. Mostly it was just changing the brightness/contrast with the mid tones but I also had to make the whites and blacks look a bit more red-y to go with the previous shot and not to show any visual colour jump.
The very last thing that I did to all the clips was adding black bars at the bottom and the top of the screen. There are two main things I said that made a shot look professional and that was blur and stabilised motion, but when it comes to editing I use black bars within the narrative to give the cinematic feel of a widescreen 16:9 or 2.39:1.
Tuesday, 3 December 2013
Further Research #16
 The extremity to which I want this music video to not only be a success but more importantly something that I want to be proud of has led me into this intense amount of further research for the video. The bar of expectation for the music video has been set very high, and is built under many complex, but very important aspects and this is the sole reason to why I though it'd be best to watch all of these tutorials underneath.
 All of the videos are noted for being helpful for people making films and of whom want to better their films and make them look a lot more professional. The reason that I have looked into the 'Film Look' as a whole, rather than just music video production specifically, is because most of my video (or at least, most of the significance) is displayed through the use of narrative. Having a more professional, more aesthetically pleasing look to the narrative scenes engages audiences. On the other hand though I still do like the fast-paced, creative and unique feel you get with an indie-style music video. Therefore I decided that to try and make this work on an efficient and likeable level I had to find the perfect balance between indie-film and indie-music video, to thus create a engineered integration that would and could be explored by many.
 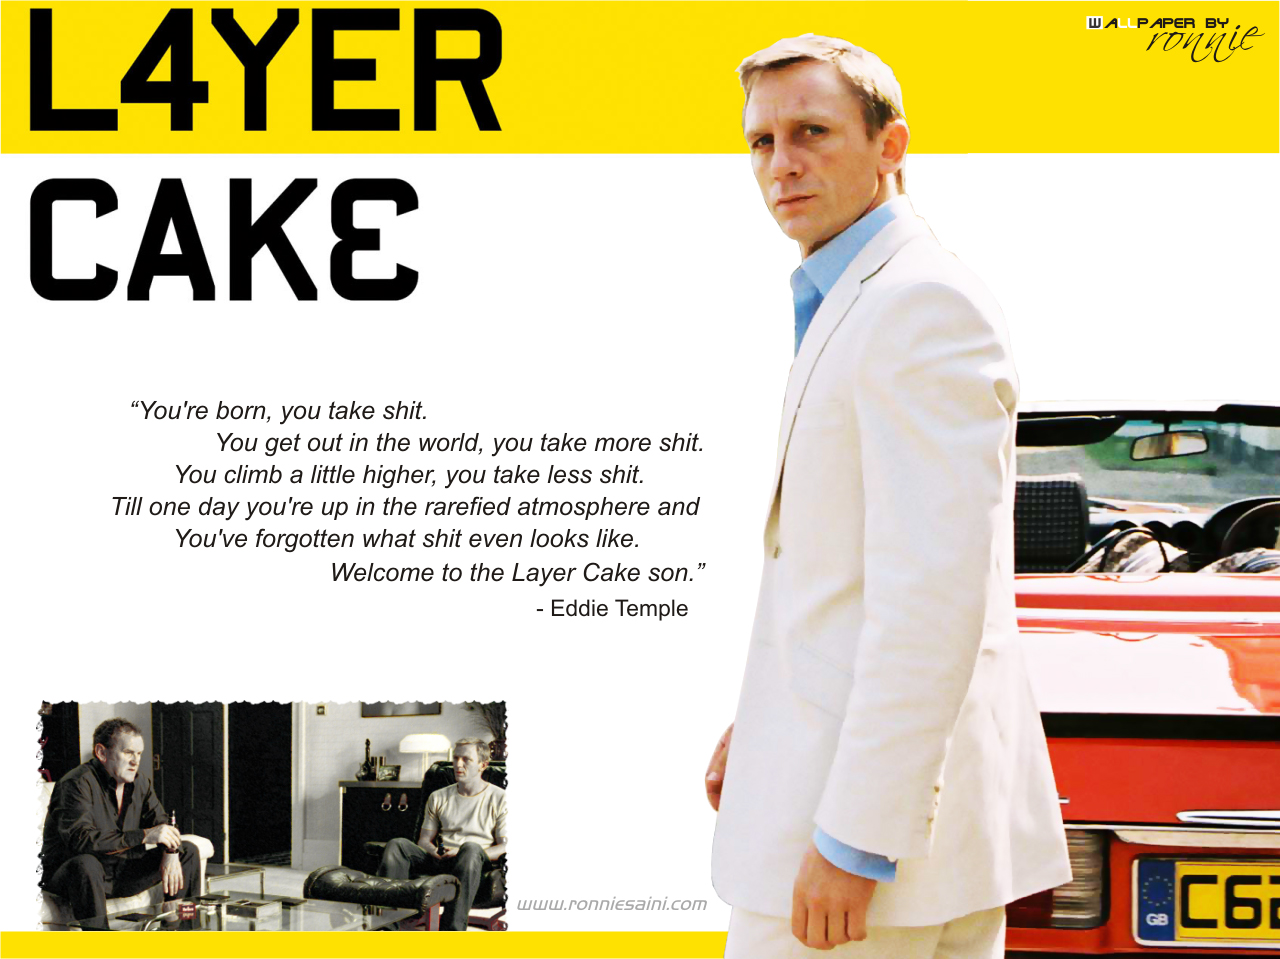 That's my vision for the end product, no matter how plausible it may be. To try and lessen the gap of implausibility though was the result of this list beneath this. I have also looked a lot into many indie games such as 'Badland', many british films such as 'Layer Cake' and 'Submarine' and critically-acclaimed TV shows such as Breaking bad - all to get the best possible opportunity for my vision.
a lot of the videos below focus mainly on budget-filming, and these mostly come from YT channels 'FilmRiot' and IndyMogul'. I have been a fan for a long time and used a lot of their tips to help me with other work, and I believe that using budget techniques is the way forward for aspiring filmmakers like myself, but to make them so inconspicuous isn't always necessary. Compared to the narrative, the band performance doesn't have to be so 'professional' because it being or looking amateur can have its benefits. However the 'amateur' aspect has to be heavily thought out and has to be evident and relevant to the shots and the context at which it is presented in. Indie music videos show a lot of this amateur-ness in them and one of them that I enjoy and am inspired from is the video Flashlight by The Front Bottoms. I love the fluidity of the shots and the simpleness to them, the fact that they aren't produced using a giant thousand pound jib, or a multi-million pound stage/studio makes it that much more personal to the audience. Celebrities are often put on a tall platform where they're perceived to be god-like, lowering that platform to a much more fathomable and empathetically realistic height can have an effect that is much more empowering to the interpreter. This only works in certain situations and the genre indie is especially where it prospers most. The creators of the media texts aren't out to glorify people or the envious life at which they may live, but they make the products to present a powerful and deeply emotional meaning that can only be seen and understood through the art they make.

I have read many books, watched many films and listened to many songs all to try and understand the mechanical beauty of the genre and how I can make my own just as elegant. Incorporating all this research into a three and a half minute video is going to be very hard, but it is what i am most looking forward too.

Monday, 2 December 2013
Equipment List #15

Equipment List
- Sony A57 DSLR
- Gopro Silver Edition
- Kodak Playsport Zx3
- Nexus 5
- RODE VideoMic
- Zeikos 0.18x Fisheye Lens Adapter (with macro also)
- Smartphone fisheye
- Zeikos filters
- Lens hood
- Manfrotto Tripod x2
- Glide Gear SYL 3000 Steady Cam
- Joby Gorillapod
- niceEshop(TM) Mute Flex Skater Dolly Stabilizer
- 16 GB SD Card x2
- Camcorder Video Light and filters
- x100 LED Fairy Lights
- Rear bike light
- Front bike light
- x4 Green Cloths 1.5m x 1m (green screen)
- Green insulation tape
All of this equipment that we will be using is individually very significant and each play a major role into the production of the music video. However there is a lot of very technical and hard-to-use equipment here so in order to understand it, capture and take them all to their full potential I had to once again do some heavy research via YouTube.
It wasn't so much the actual use of individual items that concerned me mostly, but it was more the collective use of groups of equipment (such as cameras, lights, tripods/stabilisers etc.) and how they can all work simultaneously together with excellent creative integration.
Sunday, 1 December 2013
Talking with the band & Cast #14
This project is currently and in the future, going to take a lot of effort and time from I my parter and many other individuals. I knew that depending on others is always going to be a challenge, and the more people you have to be dependent on the larger the amount of problems that can hinder your expected finishing time frame. This is why the talks with the other cast members and the band members also was initiated and confirmed for casting a long time before the preliminary filming even started. The reason for this was because I felt that I had to get an evident decision from my chosen/ideal members to whether or not they wouldn't be reluctant to help and this meant that we would have more time to work around everyone's schedules and make the filming a lot easier on everyone.

James Dyer is a good friend of mine and I have worked on many projects with him before, including previously recording his band twice. Of course this relationship does help in minors situations, but it will mostly be down to the creativity and outcome of the filming on the day (however it does mean I'm not afraid to persuade the band to be a bit more enthusiastic or not).
The band I have picked to help us with our music video though is a purposeful (and to some extent, lucky) choice too. I know from experience that they like the band and the song that they will be playing, and they also play similar sounds to the very same genre also. This then creates a better sense of character, and because the band performance plays such an important part to the video, character is key because if the belief and the emotion is there to be encapsulated then the audience will be there to do so.
Luckily our narrative only includes one other person (apart from myself and my partner), and that role is for the character of the firing-boss. For this role we knew we needed someone that looked powerful and very important, and this is why we chose someone that looks older, that is wiser with more experience compared to out adolescent-looking individual (me). This hopefully adds to that belief of character, and existentially, the belief of the whole story in its entirety. This is why I chose and asked both my Tutor and the Section Leader for the sixth-form for the role, as I thought he'd be perfect for it. We'd also get the office a long with it too - so it was a clear win, win situation.

Saturday, 30 November 2013
Diary Entry - Filming & Editing No.1 #13


For the filming we had to make sure that I and the camera was in exactly the same places for every location that we filmed. There were many attempts at trying to find a tape measure or any other instrument we could use to record every distance and make the accuracy more viable, but unfortunately we couldn't find any and we had to resort to just using vague amount of footsteps every time. I did know that we had little time in order to film these shots and with that knowledge as well as the limited amount of knowledge on the framing etc. we produced loads of shots (more than we needed to) in order to give us that extra amount of reliability.
 Next came the editing of the shots, and this was by far the more complex of the two processes. It included many tedious refinements towards the end of the edit for myself and this was the most time consuming part of the job. The pictures/screenshots below show all the aspects that the editing consisted of, and although the sequence is only 5-7 seconds long, there was a lot of hard work and thought put into it to make it perfect.
First of all I had to find the shots that I wanted, and ones that represented the theme of urban to country. Once I had done this the important thing to further lay down the foundations to the edit was to arrange and split each video so that they are roughly the right points at which they will be played through together at the end. The final bit was to refine each video so that I would look to be walking through different locations simultaneously and without any hiccups a long the way.
 For this final factor to the editing I had to use many tools within FCP X to help me sufficiently throughout the edit. The first one to use that was very helpful was the zoom tool on the clips. This of course helped because it meant that I could make very small tweaks to each clip.
 The next part of the process would be the most significant one. I had to now frame and transform each clip to match one another. For this I used the inspector to transform the scale and more importantly the position of the clip. The highlighted position of X in the clip shows how I tweaked the clips in very tiny amounts to try to make it that much better, and this proved to be an extremely helpful tool. Once I had done this for all the clips all I had to do now was lessen the extent at which the locations change (colour and lighting wise).
 The screenshots below show the level of corrections; one for colour and one for brightness and contrast. The most important to myself was the change of the brightness and the contrast, because I wasn't wanting to make each scene look the same colour etc. I was wanting myself/the protagonist to be the same colour and brightness throughout. This is what made the multiple clips collaborate so well. Therefore to do this I used the tool shown in the second screenshot below to finely tune each clip to its predecessor and successor within the timeline.


Tuesday, 26 November 2013

Tuesday, 19 November 2013
Performance Recording #11
The shooting schedule combined with he shot list, made us as a team realise that the performance part of the video is a lot more important than we first (or ever) anticipated. We then took this momentous task back to the drawing board - which has led myself into conducting and producing research and subsequently this post. So there was a few factors that we knew we had to take careful consideration in. The main aspects of a performance recording to take into account is the Camera angles, shots and movements, lighting, framing, mise-en-scène and many more. We discussed many of the factors thoroughly and it was obvious that there was going to have to be an absolute solid amount of research going into each factor and that means that when it comes to the day of the shoot, everything should hopefully be in place and ready to go.
Cameras
As we wanted the performance recording to take the least amount of time (due to restraints on time of rooms and people), it was clear to us that we were going to have to use a whole range of cameras. There was a multiple amount of shots that seemed desirable to us from previous research, and we eventually used this evidence to produce the video below.
For the shoot, the requirements that was initiated would be two:
- DSLR Cameras (to get high-quality footage - mostly close-ups)
- Go Pro Camera and possibly some other head cams. (to get P.O.V and Fisheye shots, as well as easier aerial and up-looking shots.)
- One/two Full HD Camcorders (For those wide angle mid and long shots)
- One ultra durable camera to mount to various different places (either on drum kits, guitars, ceilings etc.) via a Gorilla pod, duct tape or string.
We have a vast array of equipment at our reach and we want to make the plan completely solid so that we can get our full potential out of them.
Through the discussion I concluded that the main factors of this performance recording that we wanted to focus on and take full advantage of was going to be the colour/look of the shot and the creativeness and uniqueness about them. Lighting will play a major part in the colour part of the shots because as we found with previous shots, the more light you get the easier it is to colour correct in the editing stages to a standard that you utterly proud and happy with. The individuality and imagination that will go into our shots will be hopefully mostly due to the equipment we have at use and the professional ways in which we try to use them. If we were to be exquisitely ambitious then a construction and a use of a camera jib/crane would be one of the best choices, as through research it has been shown that the dynamic-ness of the shot and the way in which it moves gives it that expensive, but well-thought out look. On the other hand though, the genre 'indie' isn't about that per se but it's more about how you take the potential of the equipment that you attain and the quirky ways in which you use that. That's why I have re-inserted this mind map from earlier that highlights some key points and I've also added some other quirky shot ideas below also.

Some Other Shots
- KSP camera hanging from rope from the ceiling constantly twisting round.
- KSP camera duct-taped to ceiling with fisheye lens also attached to show an aerial view.
- DSLR/Camcorder mounted onto the camera dolly that would be continually rolling round to achieve shots.
This video below shows a few of those shots in which we tried to create and practice before we got our hands on recording the real thing. Inspired by many P.O.V GoPro videos on GoPro's YouTube channel, there are a lot of shots in this where the GoPro is used and we believe hat these kind of shots would suit our video excellent for the kind of video that we'd like to produce. There are also some recorded by the Sony A57 DSLR, and this is just to see what angles and how we'd like to conduct each shot when it is just a simplistic wide-angle/portrait Close-up/mid-shot/long-shot video.
This momentous task is going to be one of the hardest to pull off to such a high standard that I expected or at least wanted it to look like. Subsequently I chose that the video test shots above wouldn't be at all satisfactory for our preparation as directors/DOPs/Cameramen and all the other jobs that this project entails and therefore this video below has also come into existence.
For this video I followed the band Mammoth to their local gig at The Louisiana in Bristol. I was ale to set up a few camera both on and off stage and with the use of my Rode VideoMic I recorded the sound also. The video had turned out pretty well, and it gave me a lot of experience in seeing how to setup a recording should go about with the amount of cameras their positioning etc. and the editing was a very enlightening process also. The editing didn't take me long - or at least not as long as I had anticipated. I chose that because the video were all of the same length from each camera I could just layer and split them at point in accordance to the song and the different shot, and this made life a lot easier for me and a lot less time consuming. The task of recording a live event is a lot more demanding than that of a set up and rehearsed one, as of course the are no re-films. However there were many restrictions to this filming which mostly meant that I wasn't able to film dynamically, the participation though did present to me how static shots can look, and at this stage they look satisfactory, which is why I am so intrigued into the optimum amount of 'Quirky' I can display in the actual performance to make it exciting and interesting.
Live Performance Recording Test with Mammoth
Lighting
The AS coursework for media showed me just how significant lighting was within filming and it was an interview that I saw from the cinematographer of the hit TV series Breaking Bad whereby he says in the modern day there is too much focus on quality with developments of 4K and there isn't enough focus on framing, colour and lighting - factors that make the moving image the art in which it is so bewilderingly beautiful. My focus on lighting this time is going to even more excessive and I want to express the theme of quirky-ness even more so with the lighting. I want my performance recording to be a bit like the video from The Red Hot Chili Peppers song 'Can't Stop'.
To present quirky-ness I will be using lots of different lights and also to blur some of the footage to get some wonderful lens flares. We will be using most of the lights we can find from around the house such as lamps, torches etc. I also want to use my DSLR flashlight with filters as a powerful and colourful light to light up the set and produce many prominent spotlights at points. I've had many ideas for other lighting solutions also such as fairy lights, and rear and front bike lights due to their flashing motions and their small size (they would be very useful to hide in subtle places such as the bass drum).
Sunday, 17 November 2013
Props & Mise-en-scène #10
In comparison with the lighting, camerawork and he equipment that we will be using to help with those two factors, props and mise-en-scène isn't as high up on the list of significant priorities. There are many props that are important to us, but it is because of that importance they attain that make the consideration for them little as they are hard to forget about. These kind of props are such that correspond with costume also like a horse mask for the dream world scene (shown in the picture below).


This is a picture of both the scanned original drawing and the edited version of the 'Office Box' We originally thought of this as an idea to show that the person was being fire and he was going to be leaving his job. However the decision for this box to be put in the video isn't set in stone yet as we are not sure how much of the video we want to dedicate to this scene seeing as the the music doesn't start yet. But nevertheless if we do go forward with this idea then the box will contain props that connote specifically the 'Office' theme, and these are things such as a stapler, some pens, a USB memory stick as well as some personal items e.g. magazines CDs.
The colours I picked for the edited version weren't exactly random as I wanted the colours to pragmatically suggest a feeling of a lack enjoyment in the character's life and this would rival the later colours of the video that are colourful and vibrant showing a transformation.

This picture is a mock-up of how I would ideally like the band performance's mise-en-scène to look. I am still fluctuating between the ideas of a studio and a bedroom shoot but this one within the picture is evidently for a bedroom-style shoot. A lot of indie bands as well as a lot of 90's bands have music videos that are recorded at their houses as it shows origins of the band and alike to the genre also shows a more 'down-to-earth' less glorified location than many other music videos.
The band is only going to be a 2-piece band as shown. They will be located next to each other almost facing each other but also towards the camera also. This isn't a conventional way to locate band members within a shoot as they'd often be placed similar to where they would be on stage (e.g. drummer at the back, singer at the front) but seeing as there are only going ot be two of the them I wanted to follow on with the theme and make it a lot more personal and relaxed.
The bedroom shows many posters on the walls (of which they will be band and art posters) and this is mainly so that we can cooperate well with the expectations of the genre without being too similar, but also to primarily connect with the target audience and it would be most probably a similar set up in their own bedrooms.

The 'Dream World' scene and its creative contemporary look will be created using a lot of free computer animation, which will make the video look a lot more unusual. This means that our focus will be on the real-life interior and exterior shots. I am pleased with the exterior locations I have sought out in the previous post and the look they give, so I believe that adding any more props to those scenes wouldn't be of any benefit and therefore I decided against the idea. However the interior shots such as the Office scene and the whole Performance shoot, will need many props to spruce it up a little and give it that 'Indie' look that will appeal so prodigiously to our target audience. The pictures below will show the drawn-out, hypothetical look to each of the scenes that we want to create and a list of props to define each further.
The colours I picked for the edited version weren't exactly random as I wanted the colours to pragmatically suggest a feeling of a lack enjoyment in the character's life and this would rival the later colours of the video that are colourful and vibrant showing a transformation.
This picture is a mock-up of how I would ideally like the band performance's mise-en-scène to look. I am still fluctuating between the ideas of a studio and a bedroom shoot but this one within the picture is evidently for a bedroom-style shoot. A lot of indie bands as well as a lot of 90's bands have music videos that are recorded at their houses as it shows origins of the band and alike to the genre also shows a more 'down-to-earth' less glorified location than many other music videos.
The band is only going to be a 2-piece band as shown. They will be located next to each other almost facing each other but also towards the camera also. This isn't a conventional way to locate band members within a shoot as they'd often be placed similar to where they would be on stage (e.g. drummer at the back, singer at the front) but seeing as there are only going ot be two of the them I wanted to follow on with the theme and make it a lot more personal and relaxed.
The bedroom shows many posters on the walls (of which they will be band and art posters) and this is mainly so that we can cooperate well with the expectations of the genre without being too similar, but also to primarily connect with the target audience and it would be most probably a similar set up in their own bedrooms.
Subscribe to:
Comments (Atom)