Monday 27 January 2014

Digipak Ideas

Finalising the Structure and Purpose

    My research into Digipaks has proven a few things to me about my own Digipak and how I would design one if I had to for retail and consumer purpose. First of all I think that the average Digipak works best with only six panels to it and this is because this is the most sufficient number of panels that would work well to incorporate the CD as well as a visually-stimulating feeling, but without giving too much to look at. With some Digipaks eight panels or more may work a lot better and this is primarily because of the band itself and its probable popular background which means that consumers would be a lot more interested in reading big booklets, more information etc. and this is very evident in the Iron Man 2 soundtrack Digipak that featured ACDC songs and information about the band and the movie. Therefore collaborating these ideas my six panels most significant and impacting factor for production is their look and feel, as this is what'll entice consumers into buying the product.


Ideas

    The main idea for my Digipak was to create something that truly encompassed the emotions that we tried to within the music video and I also wanted to link all the panels with each other some way. So in order to do this I have produced a list of ideas and heres my top four:


My first and still favourite idea is one of a cartoon journey. Much alike to my actual music video I want to portray a 2D world on the panels where a man is making his way through different world onto new, prosperous beginnings. The pictures will be hand-drawn and they will be silhouettes on a white background.


Most of my ideas circle around research into other indie albums and their ambiguous creativeness through drawings and filmic still images. This is why my second idea is based around my own drawings of some of the elements of the dream world e.g. horse, dragon and the main character. I love the idea of mixing computer animation with real-life drawings and this is something that has also worked well in the past so I will most probably be using the same concept for this idea.


Still images are a lot easier to edit than that of a moving image, which allows me to be much more free and imaginative. Of course I will look into photo editing software and other image creation software to help me with the idea as I want to be as creative as possible, but this Digipak is going to most definitely be layered up a lot similar to the music video. The kaleidoscope on FCP gives a very cool effect on almost any image that is comes in to contact with and I want to use this as a background in some way. I then want to  take some pictures from the music videos and edit them together with some fantasy animals from the dream world to make up the Digipak.


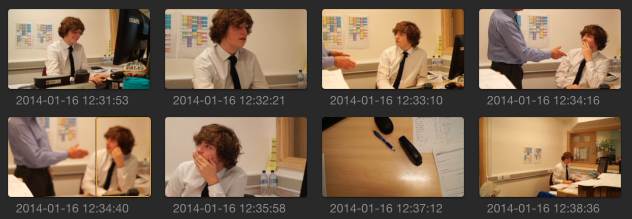
 My last idea was to have a Digipak that included an actual picture of the character at the desk as the front of the album but then with a background similar to the one in the dream world part of the music video. This wasn't such a strong idea as I don't feel from experience that working with a green screen to produce images works to a point where your expectation was but mostly the fact that I felt it was hard to expand on this idea to the other panels.

Saturday 25 January 2014

Digipak Research


    I also looked into many other Digipaks that were in the genre of indie to help me get to grips with what an 'Indie follower' likes, and what will catch their eye if it were to be sold in a shop. For this my first obvious looks were at google images, but then I looked more specifically into the indie charts on iTunes to see what the best of the genre has to offer and why people like it so much. I mostly looked into the album covers itself as this is the most significant out of the whole Digipak and I specifically looked at tyne overall style, the font, pictures etc. So here they are.

JXAeM3 on Make A Gif, Animated Gifs

     From this research it is obvious to me that considering the nature of my music video the best theme for my Digipak would be to go down the drawing route. Indie album covers (from the pictures above) are mostly made up of either drawn-out edited pictures, or photographs produced by film cameras. I have decided that a primary idea or at least a very probable idea for my Digipak then is to expand on my constructed 'Dream World' in my music video and adapt it to six panels on an album.

Thursday 23 January 2014

Rough cut 2 #29


       We wanted to produce one more rough cut for this project for two reasons: One because our last rough cut featured a lack of footage due to a vast amount of problems. And two, because we felt it wasn't perfect and we needed some feedback to help us on those problems.

   The feedback we got was generally positive. Compared to the last time, we added multiple scenes; including the two most significant - Band Performance & Dream World. We thought that we would get a more negative perception on the amount of effects and computer animation we used for the whole of the video, but again, the feedback was positive. We knew we had a solid narrative and the effects and CA transpired into that narrative and everything had a purpose, but we primarily thought that the message would be hard to understand, but fortunately for us yet again understanding of the Music Video and its meanings was well received.

Though there were many positives that we received for the video, there was inevitably some negatives also. Some people thought that the start of the video hindered the rest of the video for its overall meaning and although the meaning was clear to the end the first bit could have been more concrete. We thought beforehand that this may have been the case and we did experiment with some sound to help with the first bit, but obviously now we are going to experiment a lot more.

   There are a few shots that after watching the video multiple times we would like to change ourselves but apart from that all we have to do is to add the music in to the first bit. For this I wanted it to start out with office sounds to give a good perspective of environment, but then when the Boss comes in the sound transforms. Everything blurs and sows in tempo, and every hit with his hand is matched with a prominent blast of sound to show the severity of the situation and that it isn't just an everyday occurrence. Although this is going to be tricky we still want to try it out as it will help with our sound-production skills and we might even have to opt to sample some sounds which would be even better

Saturday 18 January 2014

Int. shots Firing #27


     This part of the recording was the most anticipated as it was the last one, and it meant that the project was almost over. However we still wanted to incorporate the same attitude and amount of effort that we did for other scenes.
    The same skills and techniques learnt from the last scenes were used for this part of the music video. We used simple continuity editing, framing, lighting etc to construct the scene shown above and below.

The Look
     So to get the look we wanted we had to do a few things before post production. We used my portable light to make the lighting more prominent on the character's face and to get enough light to edit. Selective manual focus was also very important  for us to get a more professional look with the DSLR camera that we were recording with.

Framing
    We framed the scene specifically from our previous ideas and also from the storyboard we created. My thoughts were never to have the boss be in frame above the shoulders, and this is becauseI wanted the audience to focus on his body language alone and the protagonist's reaction to it.

Colour Correction

   We used two visual editing tools (apart form the blade tool) to make this scene what it was. Colour correction has been an extremely useful tool over the whole of this project and its boundless use doesn't stop here. For each scene we created a sort of colour palette that each of the shots within the scene conformed to. Between this scene and the one that proceeds it there isn't too much of a difference and this is what we wanted. We wanted its visual integrity to stay in tact. Each scene and their colour represents the meanings and feelings presented within in the scene. We wanted to produce this with a bit of a green tint to look professional, and although the mise-en-scène is of an usual office space it gives a sense of joy to the scene. This contrasts with the narrative and what typical connotations would mean to lose your job - sad, angry etc. However our character takes this as an opportunity to change his life around, and this is the starting event that kicks it all off.

ymlbf2 on Make A Gif, Animated Gifs

Slow Motion

   The slow motion in this scene was used to accentuate the meaning of the narrative. We wanted slow, long shots with powerful, blunt sounds to collaborate together to show the character being fired. The slow motion also gives a sense of a dream-like experience and this is exactly what I wanted. I wanted the scene to seem surreal to the character, and this is a similar technique used by directors in situations where their character's are hearing life changing situations. Everything slows down, visually and audibly, and this is what I wanted to show with this scene.

Wednesday 15 January 2014

Ext. shots No.1 Fields & Beach #26

u7Ee0j on Make A Gif, Animated Gifs


CzRrI0 on Make A Gif, Animated Gifs

     Apart from the starting scene in Bristol these are our only ext. scenes within the music video. They are very important to our overall video though as they are the key elements to show the urban to country transfer throughout the narrative and especially the character development and journey throughout.


Dream World Construction #25


      This video above shows how I created the dream world from start to finish - from scanning to Ken Burns tools. There was a lot that I learnt over this project, and a lot of that acquired knowledge came from this part of the music video alone. What was so daunting and yet so exciting about this part of the music video was the vast amount of technology I was going to use compared to the arguable two pieces of technology for the rest of the video.

     Learning all of this technology from scratch, I managed to construct quite an expertise for it over time and I used FCP X and the rest of the computer software to a higher level of professionalism. Considering this I decided to create my Top 5 list of the most advanced and most helpful pieces of software or tools I used over this part of the project.

Colour Correction
     I used colour correction a lot on the foundation portfolio where I created my opening to a film, but for this portfolio and this music video I got to grips with how colour correction worked and that meant I could do a lot more with it. There was a lot of editing and a lot of different cameras used, and this meant that our overall colour for parts (e.g. Band Performance) there was a vast difference between different shots. Manually changing colours on the colour correction helped massively. Within the Dream World construction though I used the colour correction for the background to emphasise the feeling of space but also unfamiliarity. I also colour corrected my character so that he would look more part of the scenery and less obvious green screen. 

Keying
    The Keying tool in FCP X was an obvious significant tool for the whole project as a third of it was green screen, however the tool itself was very professional. Green screen and its editing became hard at points and I needed to manually edit points of the shot to eliminate colour etc. The Keying tool and its manual abilities proved to be very useful as I used the sample colour often as well as the shrink/expand, soften and erode tools too. It is this kind of opportunity that our ambition and this project has given us to grow our uses in video-editing software and expand our knowledge greatly. The great thing about FCP X and software like it, is that it is much more powerful and useful than first looks.
Compositing
    Compositing was a tool in FCP X that I only came across throughout this project. Normally I don't scroll down the 'inspector' past 'Crop' but right at the bottom I found a handy tool that helped with the weirdness and unfamiliarity as well as keeping professionalism. We used the compositing tool to help give our keyed-animals a more unique look to the video. We also used it for our background and this was probably the best use we found. We used Colour Correction to give the background that look, but it was comprised of two images and we used the compositing tool to blend them together in a specific way and it was the most perfect outcome we could have hoped for.
 Fireworks
    Fireworks is the only one in this list that isn't a part of FCP X and yet it still had a huge impact and influence on my video. Final Cut was for editing the moving image, and Fireworks was for editing the still image. Fireworks is very similar to Final Cut, n regards to its hidden accessibility. I have used this piece of software a lot before so I knew my way around it, but I used it a lot more intensely over this project than any other. My main focus for using it was to edit the Dream World from the scanned images; collaborate them and colour them in to make it more cartoonish. However I also used Fireworks for the video in places such as the movement of the character in the second scene in the city, to edit the background separately, removing the character and editing the colour also. 
Ken Burns
   The Ken Burns effect was the most significant tool I used as it brought all of my pictures to life and in motion. I used it for almost all elements within this dream sequence as I wanted everything to look realistic - or as realistic as you can get with a cartoon world, dragons and flying green horses. Nevertheless though it brought everything together and made the final music video what it was, and all in a very simplistic way. That's the other great thing about Final Cut Pro, though there may be a lot of professionalism within the software there's a lot that can be done with the simple tools.

Monday 13 January 2014

Green Screen Recording #24

     Our window to record all of the green screen recording was only an hour long so this of course meant we had hardily any time at all to get all the shots we wanted to get. There were a few shots that were of necessity for the scene but then on the same token there were many shots that we produced spontaneously just because we knew from our editing experience that there are always those gaps where something different needs to be inserted.

      We started off with the necessary shots such as the flying and the jump in and then we recorded all the other bits. The Prezi below shows exactly what we did and how we did it.


RK_YEe on Make A Gif, Animated Gifs

ja2z1W on Make A Gif, Animated Gifs

xwX1mj on Make A Gif, Animated Gifs

Saturday 4 January 2014

Performance Recording & Editing #23


Filming


        The filming today went brilliant and we managed to get all the shots we wanted to, well, to an extent. Filming all in all took a couple of hours to do and although we wanted and prepared to try and get it done a lot quicker then that we ended up with collaboratively about 3 hours worth of footage and about 10-15GB of it. The main problem with the filming was the band and their lack of knowledge of the song and the fact that they were typical musicians that easily get distracted and start jamming randomly. However, we persevered, and we managed to get it all done with a massive variety of shots under our belt. When it all got under way and we were in the flow of things it was quite easy as we could set up three cameras and the band could just play all the way through. The good thing about this technique for us is that we knew or I knew from previously recording a band live that when it comes to editing we can just layer the shots on top of each other with the music file, and once they're synced all up, we can just use the blade tool to slice between different shots and get a load of varied and different shots.

    There were many key shots that we did indeed like very much, and these were many of the shots that we set up to be non conventional and a bit quirky. What we didn't want to do when it came to the recording was to just set up a camera tripod in a few different places and just to have the basic close-up, mid-shot and long shot.
 This screen grab on the left is from the camera that we duct-taped to the ceiling. We then put the small lens adapter on it as well to get a fisheye/wide angle look in order to get everyone in the footage. It took a few times to get right because of course it is hard to see where we wanted it positioned when it is mounted but we managed to get some good shots. The camera was just left there for most of the shoot, and it managed to rack up a few half an hour clips.
     We couldn't manage to get a GoPro camera for this shoot so we weren't able to get some really good P.O.V shots. This really annoyed us as within our research the shots we took with the GoPro looked really good, but as always we persevered. In order to capture this shot shown on the left I (embarrassingly) had to stand behind the guitarist and hold the small camera to his forehead while he played for a while. It was difficult, it was strange, but it looked good in the end.
   This screen grab on the left shows the light that is next to me on the bed. When it came to the multiple close up shots that we needed of the singer my partner used the DSLR to get the best quality shot, with added blur to the background. I thought it would be a good idea while doing so to add some more light into the shot; even though there was already some lens flare from behind the singer. I used the light to flash repetitively onto the side of the singer's face as I thought this would give it a different and more interesting look. On its own, stable and bright, the light looked really good on the face but the constant on-off ness of the light made it look a lot more professional.


Editing

    For most of this project the editing is and will be exactly the same for the different scenes that we edit. However there were certain different things that we used within the performance editing that we haven't done so before with the other scenes. The timeline at the start only had in it the bristol scene and parts of the ext. shot, and because all of the performance shots had to be exactly in time with the song I decided to use the shot list and storyboard to then insert some different coloured pictures according to the different scenes and the times that they had to be on for. After this, just to get ready for the editing process, I layered all of the videos that were recorded for the whole song on top of each other and synced them all up with the music.

   We knew exactly the shots we wanted and because of the that we knew exactly where we wanted to place them. At the start I decided that because the song is very fast paced I would have very fast paced and quickly edited shots put in to correspond with the song. This was the same throughout all of the editing that I did for the performance shots. Following with this theme I also decided that the type of shots that I would put in for different parts would look different also. At the slower parts of the song I have a lot more close ups and they are more stable and slower than the others. Then when it is more quicker I decided to use the more quirky shots such as the ceiling shot and a shot taken from the camera dolly.

   Apart from just the simple editing there were many tools that we used in order to make it look a lot better and a lot more professional. The main one was the use of 'Colour Correction, and this has been a constant helpful tool for us over the project thus far and will continue to be also. 
This picture on the left shows the colour set up we had for the performance shots. Although it doesn't mean much at all we used this set up because it gave a kind of green/yellow feel to the shots, and we felt that this deeply represented the indie genre style.


     I also had to use the tool shown on the right 'Match Colour' because I was using different shots produced by different cameras and this meant when I had put the preset made by the 'Colour Correction' it didn't look quite right.  This tool made it look just right, with a few tweakings also, and made it really helpful for the editing.

   Stabilisation was used for a lot of the shots that were going to be 'slow'. There were many shots that I tried to create a smooth camera movement when filming, but with some of them it wasn't stable enough especially for the slow music. So to solve this I used the stabilisation tool and this made it a lot more smooth without losing that much quality.