

Filming
 The filming today went brilliant and we managed to get all the shots we wanted to, well, to an extent. Filming all in all took a couple of hours to do and although we wanted and prepared to try and get it done a lot quicker then that we ended up with collaboratively about 3 hours worth of footage and about 10-15GB of it. The main problem with the filming was the band and their lack of knowledge of the song and the fact that they were typical musicians that easily get distracted and start jamming randomly. However, we persevered, and we managed to get it all done with a massive variety of shots under our belt. When it all got under way and we were in the flow of things it was quite easy as we could set up three cameras and the band could just play all the way through. The good thing about this technique for us is that we knew or I knew from previously recording a band live that when it comes to editing we can just layer the shots on top of each other with the music file, and once they're synced all up, we can just use the blade tool to slice between different shots and get a load of varied and different shots.
There were many key shots that we did indeed like very much, and these were many of the shots that we set up to be non conventional and a bit quirky. What we didn't want to do when it came to the recording was to just set up a camera tripod in a few different places and just to have the basic close-up, mid-shot and long shot.


Editing
For most of this project the editing is and will be exactly the same for the different scenes that we edit. However there were certain different things that we used within the performance editing that we haven't done so before with the other scenes. The timeline at the start only had in it the bristol scene and parts of the ext. shot, and because all of the performance shots had to be exactly in time with the song I decided to use the shot list and storyboard to then insert some different coloured pictures according to the different scenes and the times that they had to be on for. After this, just to get ready for the editing process, I layered all of the videos that were recorded for the whole song on top of each other and synced them all up with the music.
We knew exactly the shots we wanted and because of the that we knew exactly where we wanted to place them. At the start I decided that because the song is very fast paced I would have very fast paced and quickly edited shots put in to correspond with the song. This was the same throughout all of the editing that I did for the performance shots. Following with this theme I also decided that the type of shots that I would put in for different parts would look different also. At the slower parts of the song I have a lot more close ups and they are more stable and slower than the others. Then when it is more quicker I decided to use the more quirky shots such as the ceiling shot and a shot taken from the camera dolly.

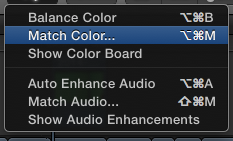
I also had to use the tool shown on the right 'Match Colour' because I was using different shots produced by different cameras and this meant when I had put the preset made by the 'Colour Correction' it didn't look quite right. This tool made it look just right, with a few tweakings also, and made it really helpful for the editing.

No comments:
Post a Comment